Shaving cream marbling is always so fun and creates amazing results! 2nd grade used this technique to emulate the movement we see in Van Gogh's Starry Night.
After the paper dried, we used black paper and yellow & white oil pastels to add scenery to our artworks.
My second graders finished their Prehistoric Art projects early, so they created a painting for Dot Day while other classes finished up. We started by watching The Dot on YouTube because I think it is more effective than me reading to them. Plus there's no "MRS. MOORE I CAN'T SEE THE PICTURESSSSSSS" from anyone.
Then we drew a large circle by tracing a coffee can lid (thanks to all my generous parents for your coffee can donations!).
After we had a dot, the kids could choose to color the inside or the outside, but not both. We used tempera paint and q-tips to make our dots.
ALSO I want to share how awesome this find is. Dollar Tree has cupcake holders. They are red and have 9 cupcake spots. They also come with a top for if you actually want to transport cupcakes, but they are perfect paint holders if you use portion cups for paint. They're plastic so they will be really easy to clean up if they get too dirty. I bought one for each table and I love them. :)
The hall space was all taken by our Prehistoric Art show, so these never went on display. :( Next year, we'll make it a school-wide event. ^_^
We used liquid tempera paint in natural colors to create painted papers for our collage. I have a set of "line tracing" cards (basically just blue credit cards) that I cut to make into paint combs. We discussed texture and what it must have been like to draw on a cave wall versus on paper. Then we made our textured paper. ALMOST too beautiful to cut up. ;)
The next week, we drew images on the back of common cave art pictures like handprints, animals, and stick figures hunting. I tried to get them to understand that we have to make shapes, not lines, to cut out more easily. Some of them understood, others got it once they drew line people and tried to cut it out. It is a learning process. ^_^
Then we crumpled another piece of paper to make a bumpy cave wall and glued our cut-out painted paper shapes on top. I was very happy with their work, they are beautiful.
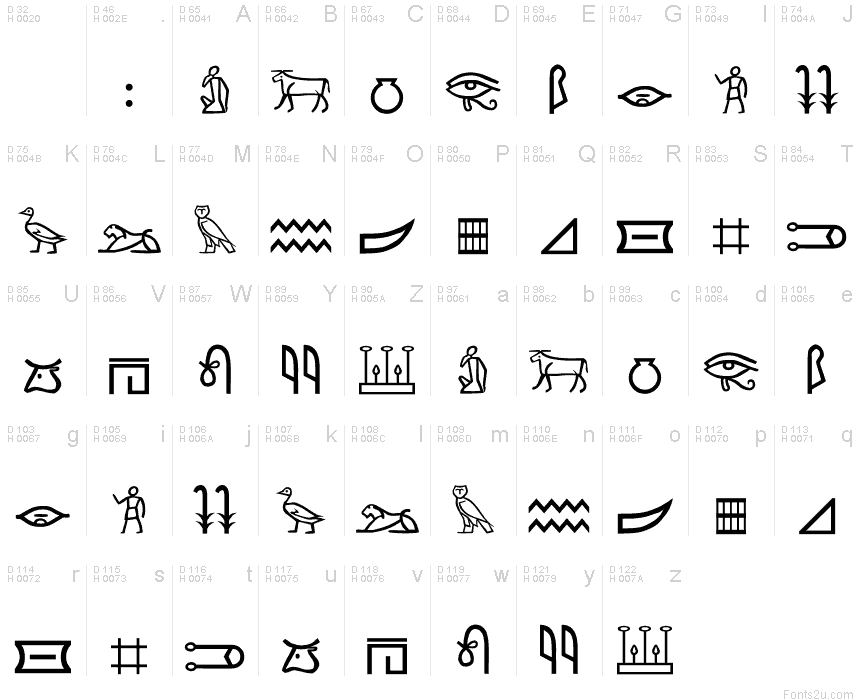
All classes just completed their Egyptian inspired projects. All projects were based on different artifacts found in Egyptian ruins and were embellished with shiny gold.They also used Hieroglyphs to write an Egyptian message on their artworks. There are many versions of Hieroglyphs, but I chose to teach them the one with the easiest images to draw.
Before we began, we played Pharaoh Bingo to learn which symbols stood for which letters.
First grade created a Cartouche using patterns and gold with a message in the middle. You can find a printout and many helpful resources on this Egyking website.
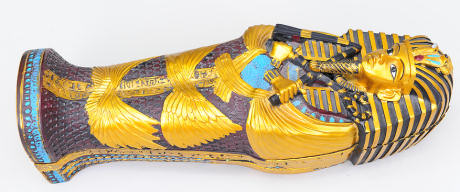
Second grade learned amount Mummification and designed a sarcophagus with patterns and gold. The handout for the sarcophagus can be found at the Activity Village page to download.
Third grade chose between four designs of Canopic Jars.I drew my own jars and made copies based on this image:
Fourth grade practiced Zentangle designs on their Cat Mummies. I drew my own to copy, but I'll try scan and upload it.
Fifth grade practiced portraits to create a face inspired by either King Tut's burial mask or the bust of Queen Nefertiti. I had a few students who were unable to complete the project because they missed days, so they designed a pre-made face found here.
Very proud of these, the kids really stepped up and did some amazing work. :)
Be warned: I gave them copies to decorate because I didn't think it was necessary to have them draw their own jars, sarcophagus, etc. for this project, and those are difficult shapes to draw. However, this caused my students to treat their projects like a "coloring sheet" and many didn't take their work seriously. In the future, I'll take my chances on their drawing abilities so that they take more pride in their work. Anyone else ever notice this happen to their students?


.jpg)


